| Back to Back Issues Page |
 |
|
global-worming-news-July-2026 #Issue 109 July 06, 2026 |
July check-in: is your worm bin sending you signals right now? (North and South)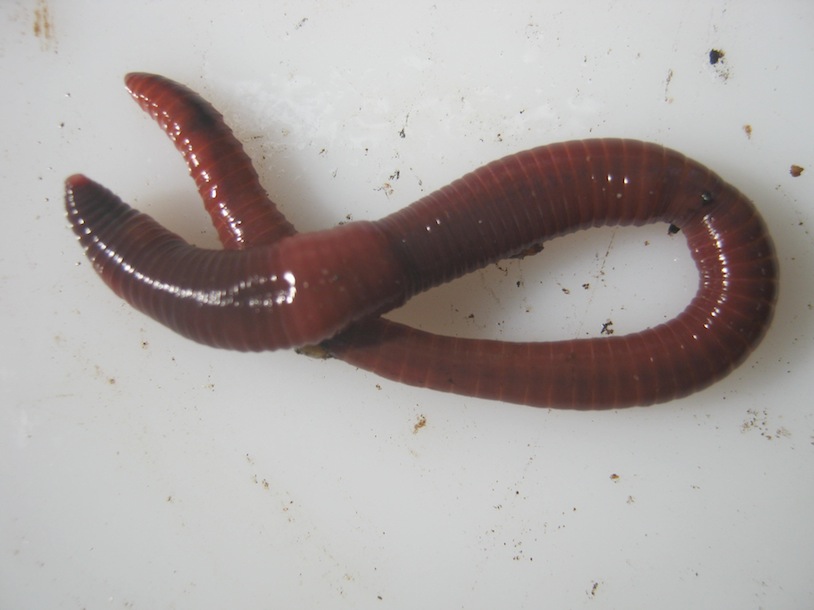 =============================================================
GLOBAL WORMING NEWS — JULY 2026
Mid-Summer Troubleshooting | Mid-Winter Care | Global Edition
Stephan Kloppert | worm-composting-help.com
=============================================================
=============================================================
GLOBAL WORMING NEWS — JULY 2026
Mid-Summer Troubleshooting | Mid-Winter Care | Global Edition
Stephan Kloppert | worm-composting-help.com
=============================================================
Dear fellow worm composter, Something I have always loved about this newsletter is that it goes to worm farmers in over 40 countries. Right now, as I write this from Cape Town, some of you are sweltering through the hottest weeks of your year — and some of you, like me here in the southern hemisphere, are wrapping your bins in blankets and watching the processing slow right down. July is the month that tests both kinds of keeper. So this issue I am writing to both of you properly. There is a full section for northern hemisphere mid-summer, and a full section for southern hemisphere mid-winter. Skip to whichever one is yours, or read both if you are curious how the other half lives. Two things in this issue apply to everyone regardless of season: a note on preparing your bin before a holiday, and something I am genuinely excited to share with you at the end. Let us start with the season you are in right now.
============================================================= NORTHERN HEMISPHERE — MID-SUMMER July Troubleshooting Guide ============================================================= July is the month I hear from more struggling worm farmers than any other. Heat builds up, feeding patterns shift during school holidays, and problems that were manageable in June can escalate quickly. Here is what to watch for — and exactly what to do about each one. --- PROBLEM 1 — HEAT STRESS This is the one that can cause the most damage fastest, so it goes first. Composting worms thrive between 15 and 25 degrees Celsius (59 to 77 Fahrenheit). Above 30 degrees Celsius (86 Fahrenheit) they become seriously stressed. In a plastic bin sitting in even partial shade, internal temperatures can exceed that threshold within an hour or two on a hot July day. Here are the signs to watch for: worms clustering at the top or trying to escape, the bin feels noticeably warm when you press your hand against the side, and reduced feeding activity even though you have recently added food. What to do right now: - Move the bin to a cooler location immediately. A basement, garage, or deep shade is ideal. Even one metre out of direct or reflected heat makes a real difference. - Stop feeding for several days. Decomposing food generates its own heat from within, and adding more during a heat event makes the internal temperature worse, not better. - Place sealed frozen water bottles on top of the bedding — two or three at a time, replacing them as they thaw. This is one of the most effective emergency cooling methods I know. Do not use loose ice. It melts into the bedding and creates moisture problems on top of the heat problem. - Mist the surface lightly with water. Evaporative cooling helps bring the temperature down gently from above. - Drape a damp hessian sack or wet old towel over the lid. Evaporation off the cover gives ongoing passive cooling throughout the hottest part of the day. Prevention for the rest of summer: - Position outdoor bins on the east-facing side of a structure where they get morning light but shade during the hottest afternoon hours. - A polystyrene box around your bin is excellent insulation against both heat and cold. I built the one I use from 5 cm poly boards from the hardware store. About fifteen minutes and almost nothing in cost — and it makes a dramatic difference. - Never place a plastic bin in direct summer sun even briefly. The greenhouse effect inside a dark container builds faster than most people expect. --- PROBLEM 2 — OVERFEEDING In my experience, overfeeding is the single most common cause of mid-summer bin trouble. It is also the most underestimated one, because the damage builds slowly and then seems to appear overnight. Here is the key thing to understand: worm feeding rates drop in summer heat. The same amount of food that worked perfectly in May may now simply be too much, because your worms are processing more slowly. Food accumulates, ferments, heats up further internally, and creates exactly the conditions that drive worms away from their food — and eventually out of the bin entirely. Signs to watch for: visible unprocessed food sitting on top of the bedding from the previous feeding, a sour or fermenting smell, or a soggy matted layer that the worms seem to be actively avoiding. What to do right now: - Stop feeding completely for one to two weeks. This is the single most effective step you can take, and the one most people resist. Your worms will not starve. A healthy established bin has enough bedding and castings to sustain the population for weeks. - Gently fluff the top layer of bedding to restore airflow into the compacted, oxygen-poor zones. - Remove any obviously rotting or very sour food from the surface if you can identify it easily. You do not need to disturb the whole bin — just take out the worst of what you can see. - Add a generous layer of dry shredded cardboard or newspaper. It absorbs excess moisture, rebalances the carbon-to-nitrogen ratio, and creates the air pockets the bin needs to recover. Prevention going forward: - Feed only what your worms can process in three to five days. When in doubt, always feed less rather than more. - In July specifically, reduce your normal feeding by roughly a third. The population has not shrunk — their processing rate has simply slowed in the heat. - Always bury food under a layer of bedding rather than leaving it on the surface. --- PROBLEM 3 — FRUIT FLIES Fruit flies complete their full life cycle from egg to adult in just seven to ten days in warm summer conditions. By the time you see the first cloud rise from the bin when you lift the lid, there are already dozens of eggs and larvae inside that you cannot see. They are not harmful to your worms directly — but an established infestation is unpleasant to deal with and always a sign that something else is out of balance. What to do right now: - Deal with the overfeeding problem first. Remove the food source and you remove the breeding ground. This is the only lasting fix. - Lay a thick layer of dry shredded newspaper directly on top of the bedding. This physical barrier prevents adult flies from reaching the surface to lay eggs. Replace it every few days. This single step makes a remarkable difference. - Make a vinegar trap: half-fill a small cup with apple cider vinegar, add one drop of dish soap, and cover the top with cling wrap pierced with small holes — or form a paper funnel pointing downward into the cup. Adult flies enter easily but cannot find their way back out. Place it beside the bin and change the liquid every few days. - If the infestation is severe, carry the bin outdoors on a cloudy day (never in direct sun) and leave the lid off for two to three hours. Adult flies disperse. Close the bin immediately, add the newspaper layer, and bring it back to its usual spot. Prevention going forward: - Freeze your kitchen scraps before adding them to the bin. Freezing kills fruit fly eggs and larvae already present on fresh fruit and vegetables before they ever reach your worms. This one habit removes the majority of fruit fly introductions entirely. - Always bury every feeding under at least 5 cm of bedding. Food left on the surface is an open invitation. - Maintain a thick dry bedding layer on top of the active zone at all times. It is your first and most effective line of defence. --- PROBLEM 4 — SMELLS A healthy worm bin should smell pleasantly earthy — like a forest floor after rain. Any other smell tells you something specific. Identifying which one you have means you can fix it correctly rather than guessing. SOUR OR VINEGARY SMELL This is acidity — the pH has dropped too low. Usually caused by overfeeding with acidic foods, or fermentation building up in oxygen-poor zones. What to do: remove any obviously fermented scraps from the surface. Sprinkle crushed eggshells across the surface and mix lightly into the top layer — they act as a gentle, slow-release pH buffer and provide grit that helps your worms digest food. Add a generous layer of fresh dry cardboard bedding to dilute the acid. Ease back on citrus peels, tomatoes, pineapple, and large amounts of coffee grounds until the bin recovers. ROTTEN, EGGY, OR SULPHUROUS SMELL This is anaerobic decomposition — oxygen has been displaced by compacted, wet material. What to do: gently loosen and fluff the entire top half of the bin to restore airflow. Add a generous quantity of torn corrugated cardboard — it absorbs moisture and creates structural air pockets. Check that all ventilation holes are completely clear and unblocked. Stop feeding until the smell clears, which usually takes three to seven days once conditions improve. SWEET, FERMENTED, OR ALCOHOL-LIKE SMELL This is the most common summer smell and the one most guides miss completely. It comes from overripe fruit scraps — watermelon, peaches, very ripe bananas — fermenting quickly in the July heat before the worms can process them. What to do: remove the fermenting fruit scraps directly. This is the one situation where removal rather than burial is the right first step. Add dry bedding to absorb the remaining moisture and sugar. Going forward, freeze overripe fruit before adding it, or reduce the amount you add per feeding in hot weather. AMMONIA-LIKE SMELL This almost always indicates too much nitrogen-rich material decomposing too rapidly. What to do: stop feeding immediately. Add a large amount of carbon-rich material — shredded newspaper, cardboard, or dried leaf matter. Aerate the bin thoroughly by loosening the top layer. In every case the foundation of the fix is the same: reduce feeding, add dry carbon-rich material, improve airflow, and give the bin time to rebalance. Most smell problems clear within a week of corrective action. --- YOUR FIVE-MINUTE JULY CHECK — NORTHERN HEMISPHERE Run through this list once this week. It takes five minutes and catches most problems before they become serious. - Squeeze a handful of bedding — one to three drops only. More means too wet, nothing means too dry. - Smell the bin before you open it fully — earthy is good, anything else needs investigating. - Check the temperature — does the bin feel warmer than it did a week ago? - Look at the surface — can you still see the previous feeding sitting there unprocessed? - Check all ventilation holes for blockages. - Watch for fruit fly movement when you first lift the lid. - Check the bin location — has it moved into more afternoon sun as summer has progressed? If everything looks and smells right, give yourself a quiet moment of satisfaction. That is a well-managed bin.
============================================================= SOUTHERN HEMISPHERE — MID-WINTER July Care Guide ============================================================= If you are reading this from South Africa, Australia, New Zealand, or South America, July is the heart of winter for you. Your bin is probably quieter, slower, and eating noticeably less than it was in autumn. That is completely normal and not a cause for alarm. But there are a few things worth knowing, and a few mistakes worth avoiding. --- UNDERSTANDING THE WINTER SLOWDOWN Composting worms slow their metabolism significantly below 15 degrees Celsius (59 Fahrenheit). Below 10 degrees Celsius (50 Fahrenheit) they become very sluggish and largely stop processing food in any meaningful quantity. Below 5 degrees Celsius (41 Fahrenheit) survival itself becomes the priority — and any significant drop below that can be fatal. In most of South Africa, including the Cape, mid-winter temperatures are cool but rarely extreme. Worms in a well-managed outdoor bin in Cape Town are generally safe without dramatic intervention. But in Johannesburg at altitude, in southern Australia, in New Zealand's South Island, or in higher-elevation parts of South America, genuine cold protection is needed. Here in Cape Town I still run bins outdoors in winter with minimal intervention — mostly just more bedding depth and a polystyrene shelter for the coldest nights. But I know from conversations with readers in Melbourne and Dunedin that their July is significantly colder and requires more active management. --- THE MOST COMMON MID-WINTER MISTAKE This is the mirror image of the northern hemisphere summer problem, and it is worth saying clearly. Seeing a slow, quiet bin, many keepers assume their worms are hungry and add more food to try to stimulate activity. The worms are not hungry — they are cold and metabolically slow. The extra food sits, ferments, and creates the same acid and smell problems that overfeeding in summer produces, but with less natural warmth and aeration to help clear it. More food does not warm a cold bin. It just creates a cold, acidic, smelly one. What to do instead: - Reduce feeding to roughly half your spring and summer rate. Match what you add to what you can see disappearing. - Chop or freeze food before adding it — partially broken-down material requires much less energy to process and suits a sluggish winter colony well. - If you open the bin and see a significant layer of unprocessed food from the previous feeding, wait until it has largely gone before adding more. There is no fixed schedule in winter — let the bin tell you when it is ready. --- KEEPING YOUR BIN WARM ENOUGH The good news is that cold protection is straightforward and inexpensive. - Move the bin indoors if possible. A garage, storeroom, or sheltered corner of the house is ideal. Even an unheated garage is significantly warmer than outside on a cold night, and that difference matters. - Wrap the bin in old blankets, hessian sacks, or bubble wrap. This is free, immediately effective, and easy to remove when spring arrives. - Build a simple polystyrene box using 5 cm poly boards from any hardware store, joined with toothpicks or duct tape. Keep the lid removable so you can feed and check without dismantling it. It takes about fifteen minutes to build and makes a dramatic difference to overnight temperatures inside the bin. - Ensure the bin has at least 30 cm of bedding depth on all sides. The bedding itself acts as insulation and allows worms to move toward the warmer centre if surface temperatures drop. - Place a large plastic sheet or bag on top of the bedding surface inside the bin before closing the lid. It slows moisture loss significantly, which is important in cold dry winter air. --- MOISTURE IN WINTER — A DIFFERENT KIND OF PROBLEM In summer the main moisture battle is keeping the bin from getting too wet. In winter, particularly in dry-winter climates like the Cape, the opposite can sneak up on you. Cold air holds less moisture, and a well-insulated but less frequently fed bin can dry out more quickly than you expect. - Check the squeeze test monthly even if you are not feeding as often. Bedding should still feel like a well-wrung sponge. - If the bin is drying out, mist lightly with room-temperature water and cover the surface with a sheet of damp newspaper before closing the lid. - Do not overwater trying to compensate. Soggy cold bedding is actually more dangerous to worms in winter than dry bedding, because cold waterlogged material displaces oxygen and there is less natural warmth to restore balance. --- WHAT TO EXPECT FROM A WINTER BIN Processing will be slower. Castings will accumulate more gradually. Your worms will spend more time deeper in the bedding rather than at the surface. Population growth will slow or pause temporarily. All of this is entirely normal — your colony is not failing, it is conserving energy exactly as it is designed to do. The reward comes in spring. A well-managed winter bin with a healthy, well-fed population in good condition bounces back quickly once temperatures rise. Spring and early summer are when worm composting is at its most productive and satisfying — and your worms will be ready for it. --- YOUR FIVE-MINUTE JULY CHECK — SOUTHERN HEMISPHERE - Is the bin temperature above 10 degrees Celsius? If not, add insulation or move it indoors. - Check for unprocessed food from the previous feeding — if it is still there, wait before adding more. - Squeeze test the bedding — is it still moist enough despite the reduced feeding? - Is the bin protected from cold nights? Check insulation and ensure the lid fits snugly. - Is the bin in a draught-free location? Cold wind chill through gaps affects internal temperature significantly. - Are you feeding smaller, pre-frozen or pre-aged portions suited to the slower winter processing rate?
============================================================= FOR EVERYONE — PREPARING YOUR BIN FOR HOLIDAYS ============================================================= July is peak holiday season for many of you — and a bin that is well prepared before you leave will manage perfectly on its own. Here is the encouraging news first: a healthy established bin can manage for two to three weeks without any attention at all. I have personally left a bin for up to three months and found the worms thin but very much alive. Two weeks of normal feeding afterwards had them fully recovered. Worms are considerably more resilient than most people assume. That said, a few simple steps before you go make the difference between coming home to a thriving bin and coming home to a problem. Before you leave — the checklist: - Add a generous and varied feeding two to three days before you go — not the day you leave. This gives food time to soften and start decomposing so it is accessible to the worms immediately, rather than sitting fresh and untouched while you are away. - Vary what you add. A mixture of materials that decompose at different rates means a more sustained food supply over the weeks ahead. - Add plenty of water and confirm that all drainage holes are working correctly. Excess water must be able to drain freely. - Place a large plastic sheet or bag on top of the food and bedding inside the bin before closing the lid. This slows moisture loss dramatically over the weeks you are away. - Ensure the bin lid is securely closed to protect against predators. Birds in particular will investigate an unsecured bin. - Northern hemisphere readers: make sure the bin location will not overheat during your absence. The problem does not pause while you are away, and there will be no one there to move it. - Southern hemisphere readers: add extra bedding depth and insulation before you leave. A cold snap while you are away is harder to respond to than one you are present for. - If a trusted neighbour or family member is available, a single cup of kitchen scraps once a week is genuinely all they need to add. Simple written instructions and a small thank-you goes a long way. Worm farming should fit around your life, not the other way around. A thoughtfully prepared bin will look after itself while you rest.
============================================================= SOMETHING I HAVE BEEN WORKING ON FOR YOU ============================================================= For the past few months I have been quietly developing something I think many of you will find genuinely useful. It is a printed workbook and planning journal designed specifically for worm farmers. Not a book to read — a practical tool to use alongside your bin. It gives you a structured place to record your feedings, track bin conditions month by month, plan your harvests, note what your worms are responding to, and build up a real picture of how your own system works over time. That kind of record is something most worm farmers wish they had started earlier — including me. I have included monthly planning pages, seasonal checklists, feeding and observation logs, a harvest tracker, and a troubleshooting notes section. It works for any bin size, any setup, and any climate. It is designed to be printed and kept beside your bin, not stored on a screen. It will be available very soon as a downloadable PDF and in print. Subscribers to this newsletter will hear about it first and will receive the best price available anywhere. If you are interested, reply to this email with the word PLANNER, and I will make sure you are on the early notification list. I have already had several people ask about this, and I want to make sure you do not miss it.
============================================================= UNTIL NEXT MONTH ============================================================= Whatever the season is where you are, I hope your bin is giving you more satisfaction than frustration right now. And if it is giving you frustration — I hope something in this issue helps you turn that around quickly. That is exactly why I write this newsletter. The August issue will be about worm castings: when they are truly ready, how to store them properly, and how to put them to work most effectively in your garden. That is the moment when all the patience and careful management pays off most visibly — and it is one of my favourite topics to write about. I think you will enjoy it. With warm regards from a chilly Cape Town, Stephan Kloppert worm-composting-help.com Global Worming News ============================================================= You are receiving this newsletter because you subscribed at worm-composting-help.com. To unsubscribe, use the link below. ============================================================= |
| Back to Back Issues Page |