How to Start Worm Composting at Home
A Complete Beginner’s Guide to Vermicomposting Success
Worm composting, also known as vermicomposting, is one of the simplest and most effective ways to recycle kitchen scraps into rich, nutrient-dense fertilizer for your garden.
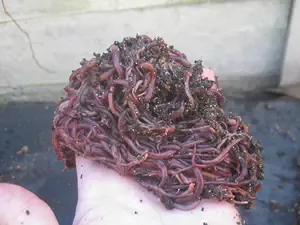
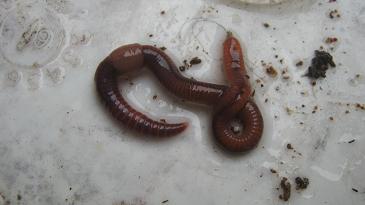
Using special composting worms—primarily red wigglers (Eisenia fetida)—you can turn fruit and vegetable peels, coffee grounds, and other organic waste into worm castings (vermicast) and worm tea that plants absolutely love. Unlike traditional backyard composting, worm composting works efficiently in small spaces, produces little to no odor when done right, and can even be done indoors. If you're looking to reduce landfill waste, create amazing organic plant food, and maybe even explore a side income stream, starting a worm bin is an excellent first step.

How to Start Worm Composting at Home
This guide walks you through everything you need to know to get started successfully and avoid common pitfalls. Why Start Worm Composting? The Benefits Go Beyond Just Compost. Home worm composting offers multiple advantages that make it worthwhile for gardeners, eco-conscious households, and urban dwellers alike.
- First, it diverts significant organic waste from landfills. A single pound of red wigglers can process up to half a pound of food scraps per day under ideal conditions. Over time, this adds up to meaningful organic waste reduction.
- Second, the end products—worm castings and compost tea—are excellent soil conditioners. Worm castings contain beneficial microbes, enzymes, and nutrients like nitrogen, phosphorus, and potassium in
- forms that plants can readily absorb. Many gardeners report stronger root systems, better disease resistance, and higher yields when using vermicompost.
- Third, it's low-maintenance and family-friendly. Once established, a worm bin requires only minutes of maintenance per week. Children love observing the worms at work, making it a great educational tool for teaching decomposition and sustainability. Additional perks include odor-free operation (when balanced properly), the ability to process challenging wastes like certain pet manures (with caution), and the potential to expand into a small home business recycling waste for others or selling castings and worms for composting and fishing bait.
Choosing and Setting Up Your First Worm Bin

How to Start Worm Composting at Home? Getting started is straightforward and budget friendly. You don’t need fancy equipment.
Step 1: Select a Bin
- Choose a plastic storage container (10-20 gallons for beginners), a wooden box, or a commercial stacked worm bin system.
- Ensure it has a lid and good ventilation.
- Drill small holes in the sides for airflow, and drainage holes in or near the bottom if it’s a single-tier bin.
- For indoor use, a flow-through or tray system works well to minimize mess. Many successful setups start with simple homemade options using repurposed containers.

Step 2: Prepare the Bedding
- Worms live in the bedding, not soil. Shredded newspaper, cardboard, or coconut coir makes excellent bedding.
- Soak your bedding Material in water until it reaches the consistency of a wrung-out sponge—moist but not dripping.
- Add a handful of garden soil for grit and microbes, then fluff it up for aeration.
- Aim for 4-6 inches of bedding to start. For more details on ideal materials, check out our guide to worm bedding options
Step 3: Add the Worms
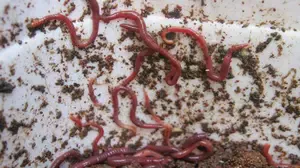
- Order 500 to 1000 of red wigglers for a small household bin.
- Let the bin settle for a few days with just damp bedding before adding worms and food. This allows beneficial microbes to activate.
- Place the bin in a location with temperatures between 55-77°F (13-25°C)—avoid direct sun, extreme heat, or freezing conditions.
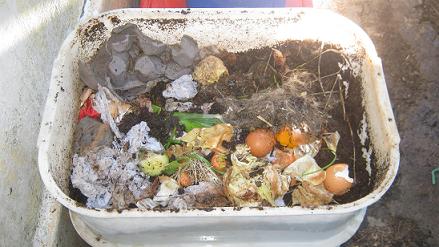
Step 4: Introduce Food Gradually
- Start small. Bury chopped fruit and vegetable scraps, coffee grounds, tea bags, and crushed eggshells under the bedding.
- Avoid meat, dairy, oily foods, and excessive citrus or onions initially, as they can attract pests or upset the bin’s balance.

Feeding, Maintenance, and Troubleshooting for Long-Term Success
- Feed no more than what the worms can consume in a few days.
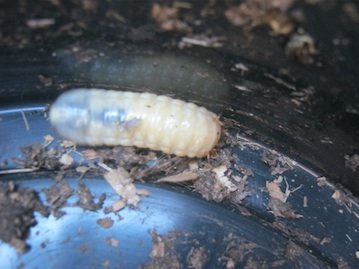
- Overfeeding is one of the most common beginner mistakes and can lead to odors and a buildup of pests like fruit flies inside the bin.
- Monitor your bin weekly: Common issues like fruit flies or maggots are manageable with proper burial of food and adding a layer of dry bedding or newspaper on top.
- For seasonal challenges, prepare your bin for summer heat or winter cold by insulating or moving it to a protected spot.
Successful worm composting relies on balance: moisture, airflow, temperature, and feeding rate.

Harvesting castings is rewarding.
Once the bin content consists of mostly dark castings, use the light-separation method or a screen to separate worms from the finished worm castings.
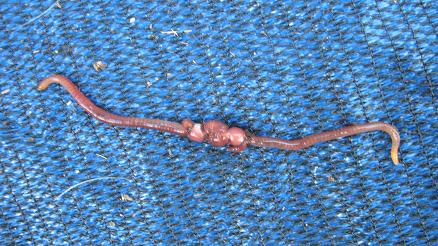
The resulting castings can be used directly in gardens, potting mixes, or as a top dressing. Many users also brew worm tea by steeping castings in water for a liquid fertilizer boost. With consistent care, your worm population will multiply naturally through cocoons, giving you surplus worms to expand bins or to start new worm bins.
Taking Your Worm Composting Further
- Worm composting scales beautifully
- What starts as a simple kitchen waste recycler can become a source of high-quality castings for sale or even a small profitable venture.
As you gain confidence, experiment with different setups—like indoor systems for apartments or larger outdoor operations.
To stay updated with tips, seasonal advice, and reader experiences, consider signing up for our:
FREE monthly Worm Composting News newsletter.
- It’s a great way to keep your bins thriving year-round.
- Whether you’re motivated by healthier soil, waste reduction, or curiosity about nature’s recyclers, worm composting delivers quick wins and long-term satisfaction.
- Start small, observe your worms, and adjust as needed—you’ll soon have one of the best natural fertilizers available.
Ready to go deeper? Many who master home vermicomposting discover opportunities to turn their passion into a rewarding side activity. Explore practical insights from years of hands-on experience to see what’s possible when you combine composting know-how with smart, low-budget strategies.
For more information have a look at articles in the Beginners guide of worm-composting-help.com
Go from how to start worm composting at home to Working from home
----------
10 good reasons to start a worm farm!
----------
Return from the "How to start worm composting at home" to the "Home Page"
-----------
Worms convert horse manure into plant food!
-----------
----------
More info about growing plants and fish together
The Worm Bin Checklist:
"7 Mistakes Killing 90% of Beginner Worm Farms"
[Sign up below to Get Your Free Checklist ]
Recent Articles
-
how to start worm composting at home
Apr 29, 26 09:21 AM
 Learn how to start worm composting at home with this complete beginner’s guide. Step-by-step setup for a worm bin, best bedding, feeding tips, troubleshooting, and harvesting worm castings for superio…
 -
How to Start Worm Composting for Beginners in 2026
Apr 17, 26 08:19 AM
Learn how to start worm composting for beginners in 2026 with this complete step-by-step guide - Best worms, easy bin setup, feeding tips, maintenance, and troubleshooting -
Worm Bin Problems: 8 Common Issues and Easy Fixes (2026)
Apr 14, 26 11:54 AM
 8 most common worm composting issues 2026 — including bad smells, escaping worms, fruit flies, and soggy bins — plus simple, proven fixes that actually work.
Search / Suchen
On SPECIAL
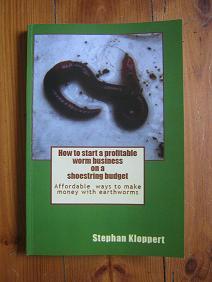
"How to start a profitable worm business on a shoestring budget
Order a printed copy from "Amazon" for only
$11.95
or a digital version from the "Kindle" store for only
$4.95
Prices valid till 30.04.2026
Our New Book
Order the Kindle E-book for the SPECIAL PRICE of only
$3.95
Prices valid till 30.04.2026!
