How to Start Worm Composting for Beginners in 2026
The Complete Step-by-Step Guide to Vermicomposting Success
Worm composting, also known as vermicomposting, has exploded in popularity as more people seek sustainable ways to handle kitchen waste while creating premium garden fertilizer. That's why this "How to start worm composting for beginners in 2026 guide is so valuable.
Whether you live in a small apartment, suburban home, or have a backyard, starting a worm bin is one of the easiest and most rewarding green projects you can begin this year. This comprehensive guide walks you through everything a true beginner needs to know to set up, maintain, and even scale a worm composting system successfully.
Why Worm Composting Is Booming Right Now.
Organic waste makes up a huge portion of household trash, and landfills struggle with the methane it produces. Worm composting turns that waste into "black gold"—nutrient-rich worm castings and worm tea that outperform many commercial fertilizers.
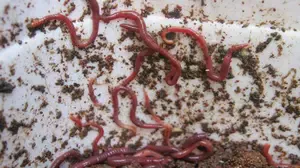
Red wiggler worms (Eisenia fetida) process scraps quickly, improve soil structure, boost plant growth, and act as a natural pest deterrent.
Benefits include:
- Zero odor when done right.
- Compact size—perfect for balconies, kitchens, or garages.
- Fast results—harvest castings in 2-4 months.
- Positive environmental impact—reduce landfill contributions and greenhouse gases.
- Potential income—many turn it into a side hustle selling worms, worm castings, or worm tea.
Demand for practical, beginner-friendly vermicomposting advice keeps growing, especially among urban gardeners, families, and eco-conscious homeowners looking for hands-on sustainability.
How to Start Worm Composting for Beginners in 2026
Choosing the Right Worms and Bin
Not all worms work for composting. There are quite a few good composting worms but the Red wigglers are the top choice—they thrive in bins, reproduce quickly, and tolerate a wide temperature range (55-77°F ideally). Avoid earthworms dug from gardens; they won't survive in bins.
Bin options for beginners:
- DIY worm bins: Two 10-18 gallon stackable bins (one with drainage holes). Cheap and effective.
- Commercial systems: Like the Worm Factory 360 for easier harvesting and odor control.
- In-ground or outdoor beds: Great if you have space and milder climates.
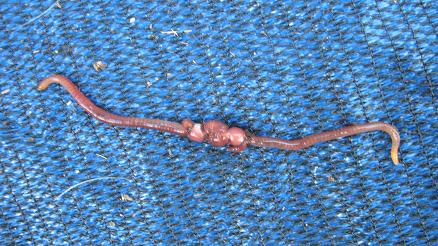
Start small with 1 pound of worms (about 1,000) for a standard household. They double every 60-90 days under good conditions.
Step-by-Step Setup Guide
- Prepare Bedding: Shredded newspaper, corrugated cardboard, or coconut coir. Moisten to the consistency of a wrung-out sponge (about 70-80% moisture). Add a handful of soil or finished compost for grit and microbes. Aim for 4-6 inches depth initially.
- Add Worms: Place them on top of the bedding. They’ll burrow down quickly. Let them settle 24-48 hours before feeding.
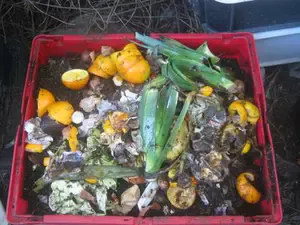
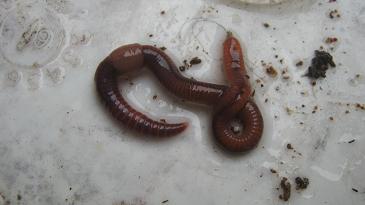
- Feeding Basics: Bury kitchen scraps (veggie peels, coffee grounds, crushed eggshells, fruit) under 2-3 inches of bedding. Avoid meat, dairy, citrus (in excess), onions, and salty/spicy foods. Start slow—feed what they can eat in 2-3 days. For more information check out our worm-food-rating-list
- Maintenance Tips: Keep the bin in a dark, temperate spot (avoid direct sun or freezing). Monitor moisture: Too wet? Add dry bedding. Too dry? Mist lightly.Aerate gently every 1-2 weeks.
- Watch for pests: Fruit flies mean overfeeding; balance with more browns.Harvesting Castings: Use the light method (worms flee light) or divide-and-pick. Finished castings look like rich, earthy coffee grounds.
Common beginner mistakes include overfeeding, poor drainage, or extreme temperatures—easy to avoid with this guide.
Advanced Tips:
Turning Worm Composting into a Small Business
Once comfortable with the basics, many expand into selling excess worms, castings, or tea. Worm castings command premium prices from gardeners, cannabis growers, and farmers. Worm tea (aerated extract) is a popular liquid fertilizer. Low-cost setups in a garage or spare room can scale profitably with minimal investment, focusing on local sales, online marketplaces, or farm stands. Success comes from consistent systems, quality output, and understanding market needs—like organic soil amendments in an era of rising fertilizer costs.
Troubleshooting and FAQs
- Smelly bin? Too much food or moisture. Stop feeding and add dry bedding.
- Escaping worms? Bin to wet, to hot, standing in heavy rain or bedding is acidic.
- Slow processing? Check temperature, moisture, and food balance.
- Kids love worm composting too. It's a great homeschool or family project.
Worm composting fits any lifestyle. Apartment dwellers use compact indoor bins; gardeners integrate it outdoors for direct soil benefits.
This rewarding practice reduces waste, enriches gardens, and opens doors to new skills—or even extra income.
With simple tools and patience, anyone can succeed in 2026 and beyond. Many who start as hobbyists discover deeper potential after mastering the fundamentals.
Ready to dive deeper and explore turning this into a real venture? Check resources on our site or consider detailed guides from other experienced worm farmers who have built sustainable operations from scratch.
Your first bin could be the start of something much bigger for your garden—and possibly your wallet.
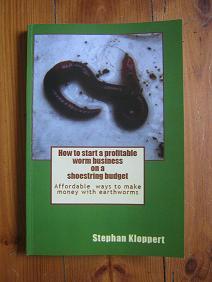
How to start a profitable worm business
---------
Return from How to Start Worm Composting for Beginners in 2026 to the "Home Page"
----------
How to build a homemade worm farm
----------
Worms convert dog poop into fertilizer
----------
The Worm Bin Checklist:
"7 Mistakes Killing 90% of Beginner Worm Farms"
[Click Here to Get Your Free Checklist ]
Recent Articles
-
How to Start Worm Composting for Beginners in 2026
Apr 17, 26 08:19 AM
Learn how to start worm composting for beginners in 2026 with this complete step-by-step guide - Best worms, easy bin setup, feeding tips, maintenance, and troubleshooting -
Worm Bin Problems: 8 Common Issues and Easy Fixes (2026)
Apr 14, 26 11:54 AM
 8 most common worm composting issues 2026 — including bad smells, escaping worms, fruit flies, and soggy bins — plus simple, proven fixes that actually work.
 -
When is a good time to start a worm bin
Apr 10, 26 10:03 AM
 Good day, I am interested in worm composting and would like to know. When would be a good time to start a worm bin? I would like to compost my kitchen
Search / Suchen
On SPECIAL
"How to start a profitable worm business on a shoestring budget
Order a printed copy from "Amazon" for only
$11.95
or a digital version from the "Kindle" store for only
$4.95
Prices valid till 30.04.2026
Our New Book
Order the Kindle E-book for the SPECIAL PRICE of only
$3.95
Prices valid till 30.04.2026!
