Why Are My Worms Trying to Escape?
A Beginner's Complete Guide Before You Worry
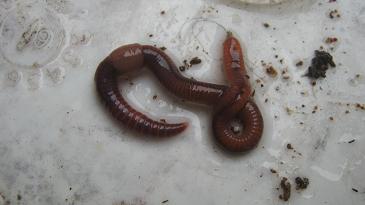
You open your worm bin and your heart sinks. Instead of happy worms quietly working through your kitchen scraps, you find them crawling up the walls, clustered under the lid, or making a break for the floor. If this has happened to you, take a breath. You have not ruined everything. In fact, you are about to learn one of the most useful lessons in worm composting

Worms do not escape for no reason. They escape because something in their home is making them uncomfortable, and once you know what to look for, you can usually fix it in under fifteen minutes. This guide walks you through every possible cause in plain language — no jargon, no complicated science — and tells you exactly what to do about each one.
💚 New to worm composting and want guidance you can trust? Join our free newsletter and get one practical, beginner-friendly worm composting tip delivered to your inbox every month. No overwhelm — just the information you actually need, when you need it.
Just fill in your e-mail below and we will send you the Free Downloadable Guide.
FREE checklist 7 Mistakes that are killing 90% of Beginner worm farms! Right now.
Before You Worry — Is It Actually a Problem?
If you have just set up a new worm bin in the last week or two, a few worms exploring the walls is completely normal. Your worms have just arrived in an unfamiliar environment and they are getting their bearings. Give them a couple of weeks to settle in before you start troubleshooting.
What you do need to pay attention to is a large number of worms moving toward the top of the bin, gathering under the lid, or actually leaving the bin. That is your signal to investigate. Work through the list below and you will find the answer.
The Quick Fix — Use This Right Now
If worms are actively escaping while you read this, here is what to do immediately: open the lid and shine a bright light directly into the bin. Worms cannot stand light and will move back down into the bedding within five to ten minutes. This stops the escape while you figure out what is causing it.
Cause 1 — The Bedding Is Too Wet or Too Dry
This is the most common reason worms try to escape, and the good news is it is usually the easiest to fix. Worms breathe through their skin, which means the moisture level in their bedding matters enormously. Too much water, and the air gets squeezed out and the worms can drown. Too little, and they start to dry out from the inside.
How to tell which problem you have — the squeeze test
Pick up a firm handful of bedding and squeeze it hard over a sink. You should get one to three drops of water coming out. If water streams out freely, the bin is too wet. If nothing comes out at all and the bedding crumbles, it is too dry.
If the bin is too wet
- Soak up any puddles on the surface with dry newspaper or paper towel
- Add a generous handful of dry shredded cardboard or newspaper and mix it gently through the top layer
- Check that the drainage holes at the bottom are clear — debris can block them over time
- Ease back on watery food scraps like melon or cucumber until things improve
- Leave the lid slightly open for a day to let moisture escape
If the bin is too dry
- Mist the surface gently with water — do not drench it, just dampen it
- Add some juicy vegetable scraps such as cucumber peel or a slice of melon
- Lay a sheet of damp newspaper over the surface to help hold moisture in
How to prevent this happening again
Do the squeeze test every week. It takes five seconds and catches moisture problems before they become serious. Always add a handful of dry cardboard or newspaper whenever you add wet food scraps — they balance each other out naturally.
Cause 2 — Not Enough Air in the Bin
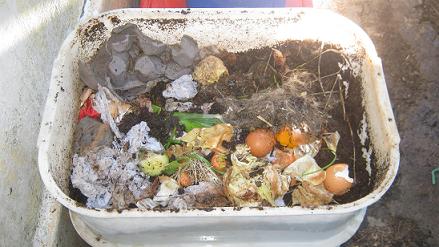
This surprises a lot of beginners. Worm composting needs oxygen to work — it is not like a sealed container. When ventilation holes get blocked, or food scraps pile up in a dense layer with no air pockets, the oxygen runs out and the bin starts producing unpleasant gases that drive the worms upward.
Signs to watch for
- A strong rotten, eggy, or sour smell coming from the bin
- The bedding looks matted and compacted with no visible gaps
- Worms gathering near the top or around the air holes
How to fix it
- Check every air hole around the bin and clear any blockages
- Gently loosen the top few centimetres of bedding with your fingers or a fork — this alone often solves the problem
- Remove any large clumps of uneaten food that are sitting in a soggy mass
- Add a few torn pieces of corrugated cardboard — they create natural air pockets as the worms tunnel through them
How to prevent this happening again
Feed little and often rather than dumping everything in at once. Always bury food scraps under a layer of bedding rather than leaving them on top. Check the air holes once a month — they block up gradually.
Cause 3 — The Temperature Is Wrong
Composting worms are happiest between 15°C and 25°C (that is 60°F to 77°F). Outside that range they get stressed and start looking for somewhere more comfortable.
Heat is the more common problem for beginners. A plastic bin left in direct summer sun can reach dangerous temperatures within an hour or two. Overfeeding can also cause the bin to heat up from within as food breaks down rapidly.
Signs to watch for
- The bin feels warm to the touch
- Worms escaping during hot weather or after a large feeding
- In cold weather: worms very deep in the bin and barely moving
How to fix it — if too hot
- Move the bin to a cool, shaded spot straight away
- Stop feeding for a few days until the temperature drops
- Place a frozen water bottle (not loose ice — that makes the bin too wet) on top of the bedding to cool it down
- A garage, basement, or shaded cupboard works well during heat waves
How to fix it — if too cold
- Move the bin indoors or into a sheltered spot
- Wrap it in an old blanket or some bubble wrap for insulation
How to prevent this happening again
Never place a plastic bin in direct sunlight, even in mild weather — the sun heats it up faster than you would expect. A shaded, stable location indoors or under cover is ideal all year round.
Cause 4 — The Bin Has Become Too Acidic
This is one of the most commonly overlooked causes, and worth understanding because it can creep up without obvious warning. When too many acidic foods are added to the bin — or when overfeeding causes food to ferment rather than compost — the environment becomes too acidic for the worms. Research from Oklahoma State University confirms that worms will actively leave an area with a low pH.
Do not worry if you do not know what pH means — you do not need to measure anything. Your nose is your best tool here.
Signs to watch for
- A sour or vinegary smell from the bin — the clearest early warning
- Tiny white thread-like worms appearing in large numbers (these are pot worms, which thrive in acidic conditions)
- More fruit flies than usual
- Worms escaping despite normal moisture and temperature
How to fix it
- Remove any obviously fermented or very sour food scraps from the bin
- Sprinkle a small handful of crushed eggshells across the surface and mix them lightly into the top layer — eggshells are rich in calcium and gently bring the acidity back to a comfortable level
- Add a generous layer of fresh dry cardboard or newspaper bedding to dilute the acid
- Stop adding acidic foods for a few weeks — citrus peels, tomatoes, pineapple, and large amounts of coffee grounds are the most common culprits
If the problem is more severe, a small sprinkle of agricultural lime (also called dolomite or garden lime or crushed eggshells) across the bin surface will help — about one tablespoon spread over a 30cm by 30cm area, mixed lightly into the bedding. One important caution: only ever use agricultural lime or dolomite. Never use hydrated lime, builders lime, or quick lime — these are caustic and can seriously harm your worms.
How to prevent this happening again
Add a small pinch of crushed eggshells every two to three weeks as a simple routine. They buffer the pH gently on an ongoing basis and also provide grit that helps your worms digest food more efficiently. Think of it as a basic supplement for a healthy bin.
Cause 5 — Rain and Wet Weather (Outdoor Bins)
If your bin is located outside, this is important to know. Outdoor bins lose far more worms during and after rain than bins kept in a sheltered spot. The exact reason is not completely settled, but experienced worm keepers believe it comes down to worms sensing a flooding risk, taking advantage of wet conditions to migrate, or reacting to the vibration of rain hitting the bin surface.
The real danger is not the escape itself — it is what happens after. Worms that leave the bin overnight and are still on the ground when the sun comes out the next morning will dry out quickly.
Signs to watch for
- Worms found outside the bin or on nearby surfaces after a rainy night
- Noticeable drop in population after wet weather
How to fix it
- Collect escaped worms quickly before the sun rises and return them gently to the bin
- If the bin has taken on water, treat it as a too-wet bin: add dry bedding and improve drainage
- Set up a worm shelter before the next rain: place large flat sheets of corrugated cardboard directly under and around the outside base of the bin. Any worms that leave will gather on the damp cardboard rather than disappearing into the garden — and you can return them easily
How to prevent this happening again
The best solution for outdoor bins is a sheltered location — a carport, shed, or under the eaves of the house. If the bin must stay exposed, make sure the lid fits snugly and keep that cardboard worm shelter ready during the rainy season. It becomes second nature very quickly.
Cause 6 — Storms and Barometric Pressure
This one sounds unusual but it is well documented. Some composting worms — especially a species called Indian Blue worms, which are very often mixed in with red wiggler shipments and look almost identical — are sensitive to changes in air pressure before thunderstorms. They instinctively move upward when pressure drops.
The important thing to understand is that this is not a bin problem at all. Nothing is wrong. It will pass once the storm does.
Signs to watch for
- Sudden mass movement upward with no obvious cause
- It happens reliably whenever rain or a storm is forecast
- Bin conditions look perfectly normal
How to fix it
No bin adjustment needed. Shine a light into the open bin and the worms will return to the bedding within minutes. Make sure the lid is secure before the rain arrives.
Cause 7 — Vibration Nearby
Earthworms are sensitive to vibration — it is a survival instinct that evolved to help them escape underground predators. In a home setting, the most common culprits are washing machines, tumble dryers, air conditioning units, and even heavy foot traffic nearby.
Signs to watch for
- Worm movement seems to coincide with the washing machine or dryer running
- The bin is near a large appliance
How to fix it
Move the bin away from the appliance — even a metre of distance can make a real difference. Placing the bin on a folded piece of hessian or a rubber mat also helps absorb vibrations coming up through the floor.
Cause 8 — Too Many Worms (Overcrowding)
Here is one that is actually good news in disguise. A healthy worm bin doubles its population roughly every two to three months. Eventually the bin gets crowded, and the adult worms start looking for more space. If your bin looks and smells perfectly healthy but worms keep escaping, this may be exactly what is happening.
Signs to watch for
- Bin conditions are fine but worms persistently climb the walls
- You can see many more worms than when you started
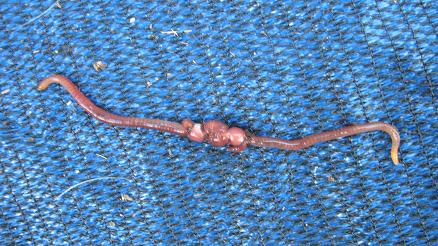
- Lots of tiny baby worms visible throughout the bedding
How to fix it — splitting the bin
The solution is simple: split your population between two bins. Scoop roughly half the contents — bedding, worms, and all — into a second bin set up with fresh moist bedding and a small amount of food. Both halves will have room to thrive.
Surplus worms are genuinely valuable. They make a wonderful gift for a gardening friend or neighbour, a great donation to a local school or community garden, or the foundation of a second productive bin of your own.
How to prevent this happening again
Check your bin every two to three months. If it looks full and healthy, split it before the overcrowding causes escapes. Regular harvesting of finished castings also creates fresh space for the population.
Cause 9 — Not Enough Food
Hungry worms go looking for food. It is as simple as that. This often catches beginners out during holidays or busy periods when fewer kitchen scraps are being generated.
How to fix it
Add a good feeding of appropriate kitchen scraps, buried under the bedding. Worms should settle within a day or two. Before a holiday, build up a larger than usual feeding just before you leave — frozen scraps are perfect for this, and they actually break down faster once thawed, making them easier for your worms to process.
Cause 10 — Something in the Bedding Is Irritating Them
Worms absorb everything through their skin, which makes them sensitive to chemicals in their bedding. Bleached white printer paper, wood treated with preservatives, or garden waste from plants that have been sprayed with pesticides can all make the bin environment uncomfortable or even toxic.
Signs to watch for
- Escapes began shortly after you changed the bedding material
- Worms seem irritated or are balling up
How to fix it
Remove the suspect material and replace with safe bedding. If the problem is severe, transfer the worms to a freshly set up bin with known-safe materials.
Safe bedding choices for beginners: shredded newspaper (black and white pages only, not colour supplements), uncoated cardboard torn into pieces, and coconut coir. All three are reliable, affordable, and easy to find.
Your Complete Escape Checklist — Work Through This First
Not sure where to start? Run through this list and the answer will usually become clear:
- Squeeze a handful of bedding — are you getting one to three drops? More means too wet, none means too dry
- Smell the bin — does it smell earthy and fresh, or sour, rotten, or eggy?
- Check all air holes — are any of them blocked?
- Is the bin in direct sun or near a heat source?
- Is the bin outdoors and has it been raining?
- Is there a storm forecast?
- Is the bin near a washing machine, dryer, or other appliance?
- When did you last feed? Has it been more than two weeks?
- Have you recently changed the bedding material?
- Is the bin very full and looking healthy? Could it be overcrowding?
Most escape problems are solved by fixing whichever item on that list stands out. If more than one applies, fix the most obvious one first and reassess.
A Note From Me
Worm composting is far more forgiving than most beginners expect, and there are many approaches that work wonderfully. What I share here is based on established knowledge and the experience of respected worm keepers worldwide — but I want to be clear that I am not suggesting it is the only way. Experienced worm farmers around the world each have their own preferred methods, and many of them produce excellent results. What matters most is understanding what your worms are telling you and responding to it. The specific method you develop is yours to discover.
If something works well in your setup, trust it. Worm composting rewards observation far more than rigid rules.
----------
----------
How to start worm composting for Beginners 2026
Recent Articles
-
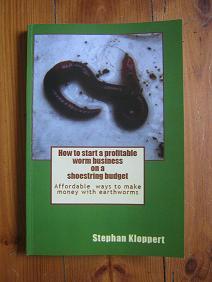
How to Start a Profitable Worm Business on a Budget
Jun 03, 26 11:02 AM
 Learn how to start a profitable worm farming business with minimal investment. Proven vermicomposting methods from 25+ years of experience. Sell worm castings, worm tea, and bait worms for real income…
 -
Worm composting Advice?
May 08, 26 03:36 AM
Hi, Just checking if you're still around? I've been growing a thriving worm farm and need some advice. Thanks, Rezah -
how to start worm composting at home
Apr 29, 26 09:21 AM
 Learn how to start worm composting at home with this complete beginner’s guide. Step-by-step setup for a worm bin, best bedding, feeding tips, troubleshooting, and harvesting worm castings for superio…
Search / Suchen
On SPECIAL
"How to start a profitable worm business on a shoestring budget
Order a printed copy from "Amazon" for only
or a digital version from the "Kindle" store for only
$4.99
Prices valid till 30.06.2026
Our New Book
Order the Kindle E-book for the SPECIAL PRICE of only
$4.95
Prices valid till 30.06.2026!